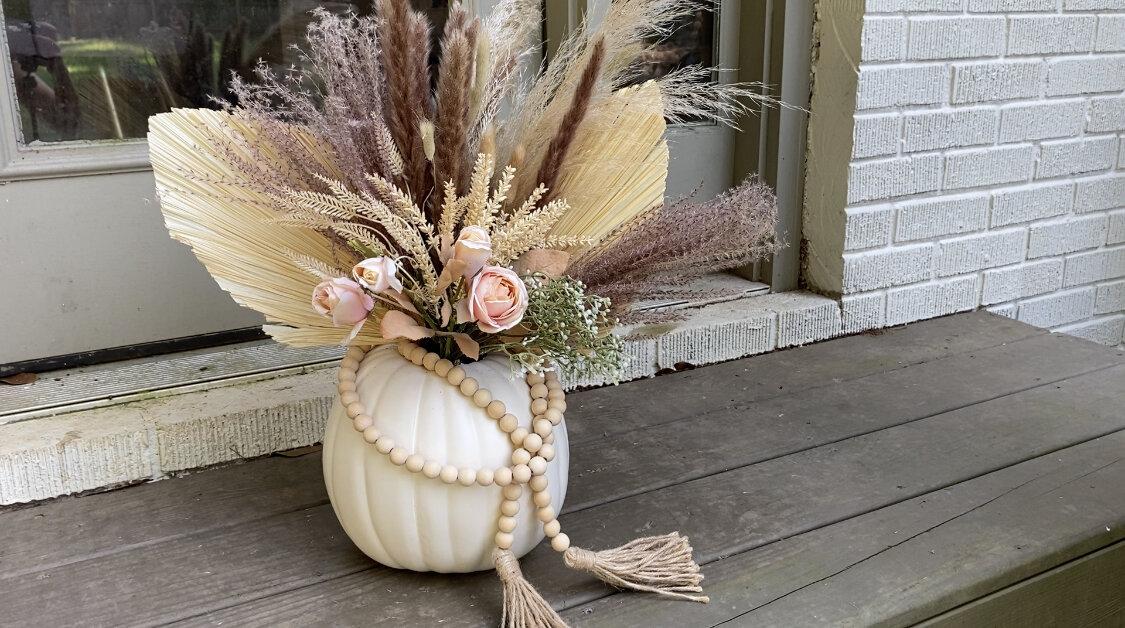

Do you find the traditional Halloween decorations too bright and flashy for your taste? If so, you've come to the right place! We've got a unique and elegant decor idea that will add a touch of sophistication to your Halloween festivities. Last year, I came across a stunning "pampas pumpkin" that caught my eye and I've been obsessed with it ever since. Since I couldn't find it in stores, I decided to make one for myself and it turned out to be easier than I thought!
How to Make a Pampas Pumpkin
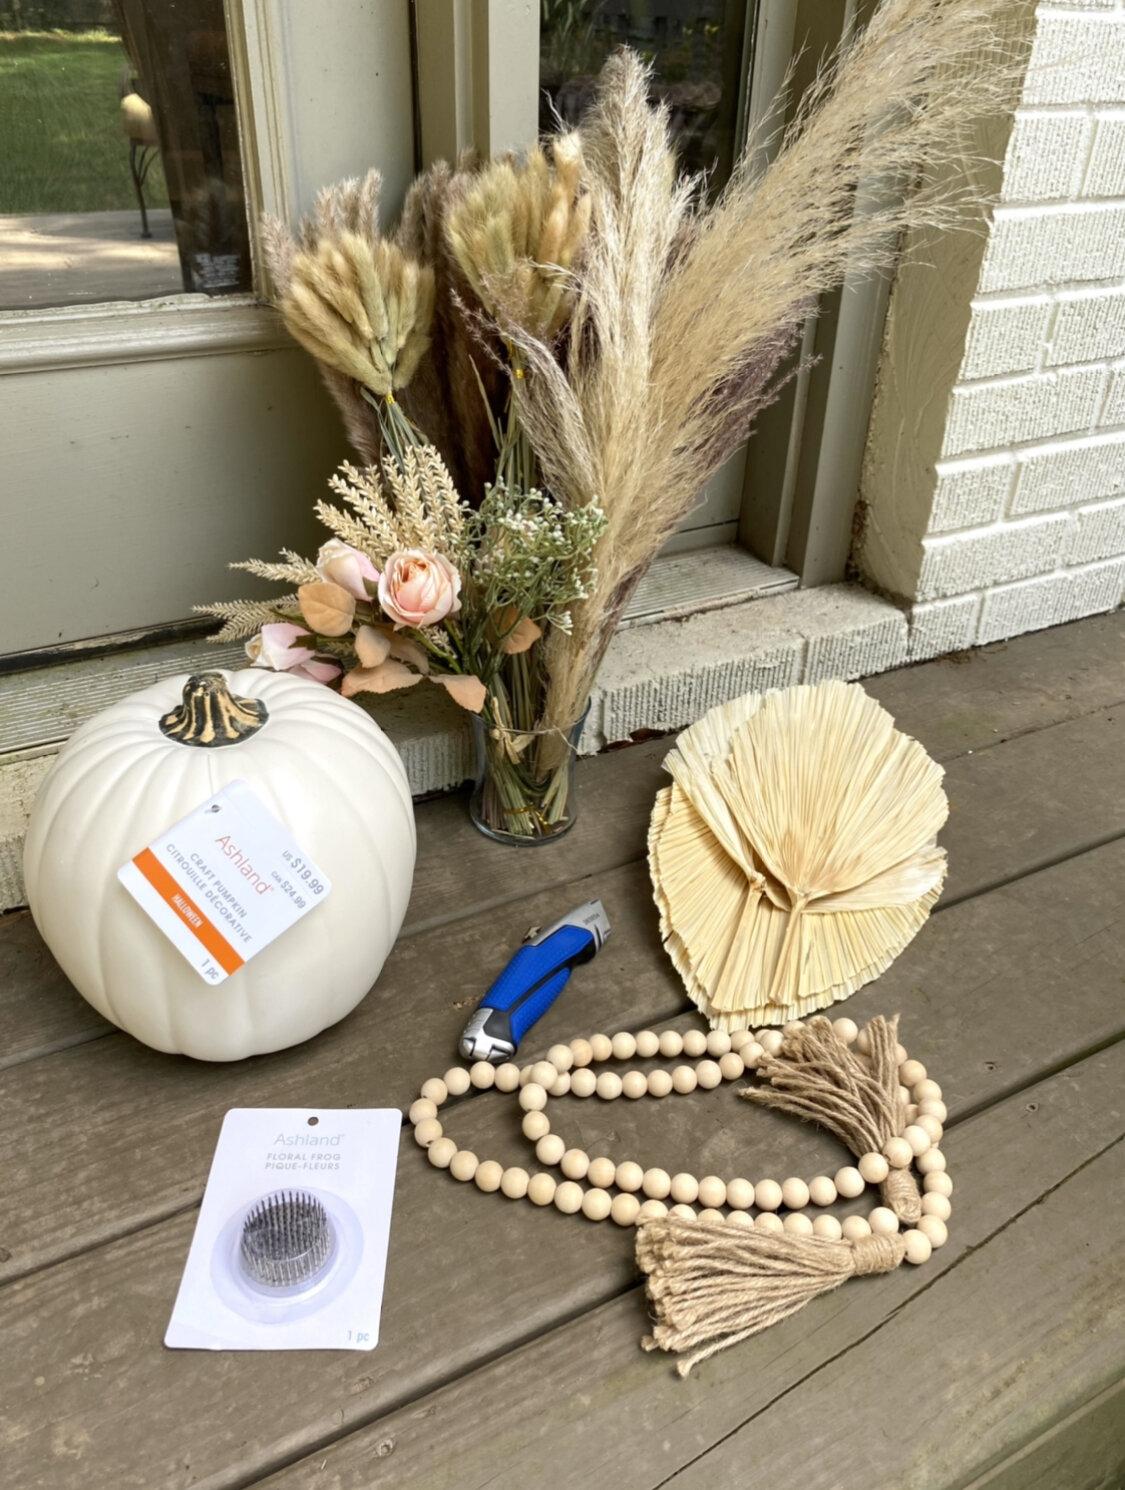

Here's what you'll need:
- Medium sized white craft pumpkin
- Box cutter
- A floral frog
- Your preferred combination of pampas and dried florals
- Wooden beaded garland
Step 1: Cut a hole in your pumpkin
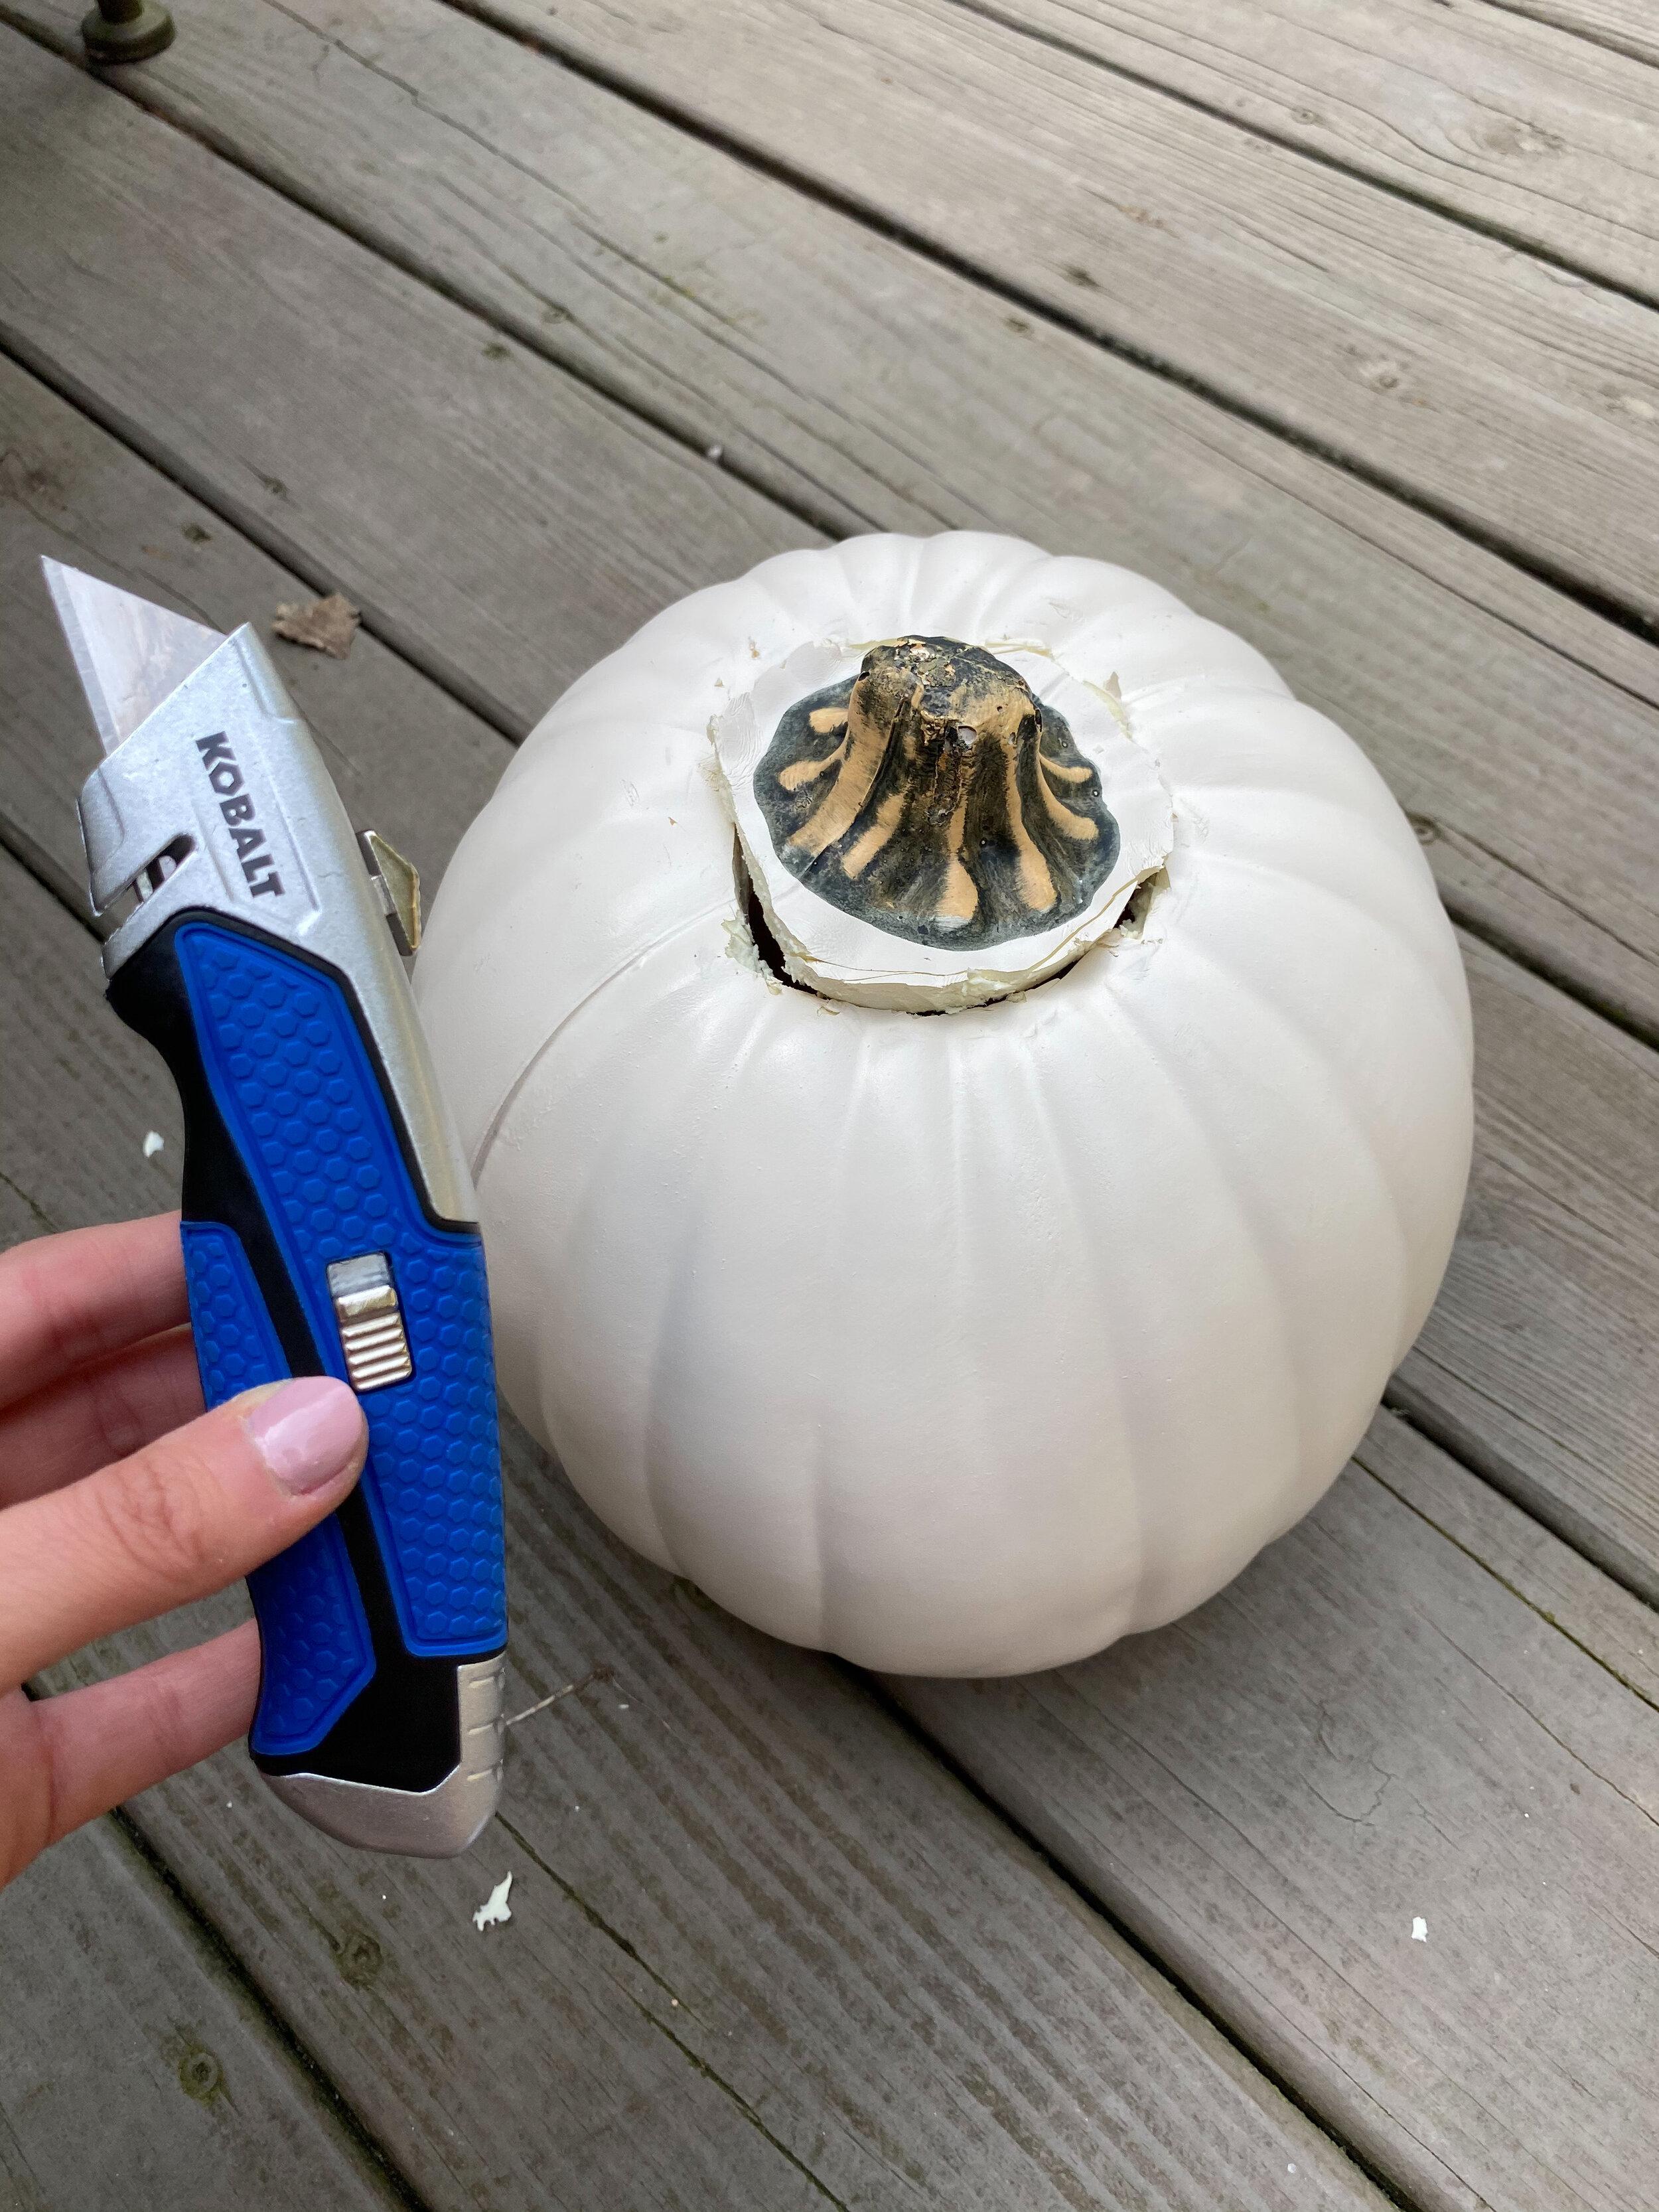

Start by using a box cutter to slowly cut a hole around the stem of your white craft pumpkin at the top. This may take a few rounds to get a clean cut, especially if the pumpkin is thick.
Step 2: Place your floral frog inside
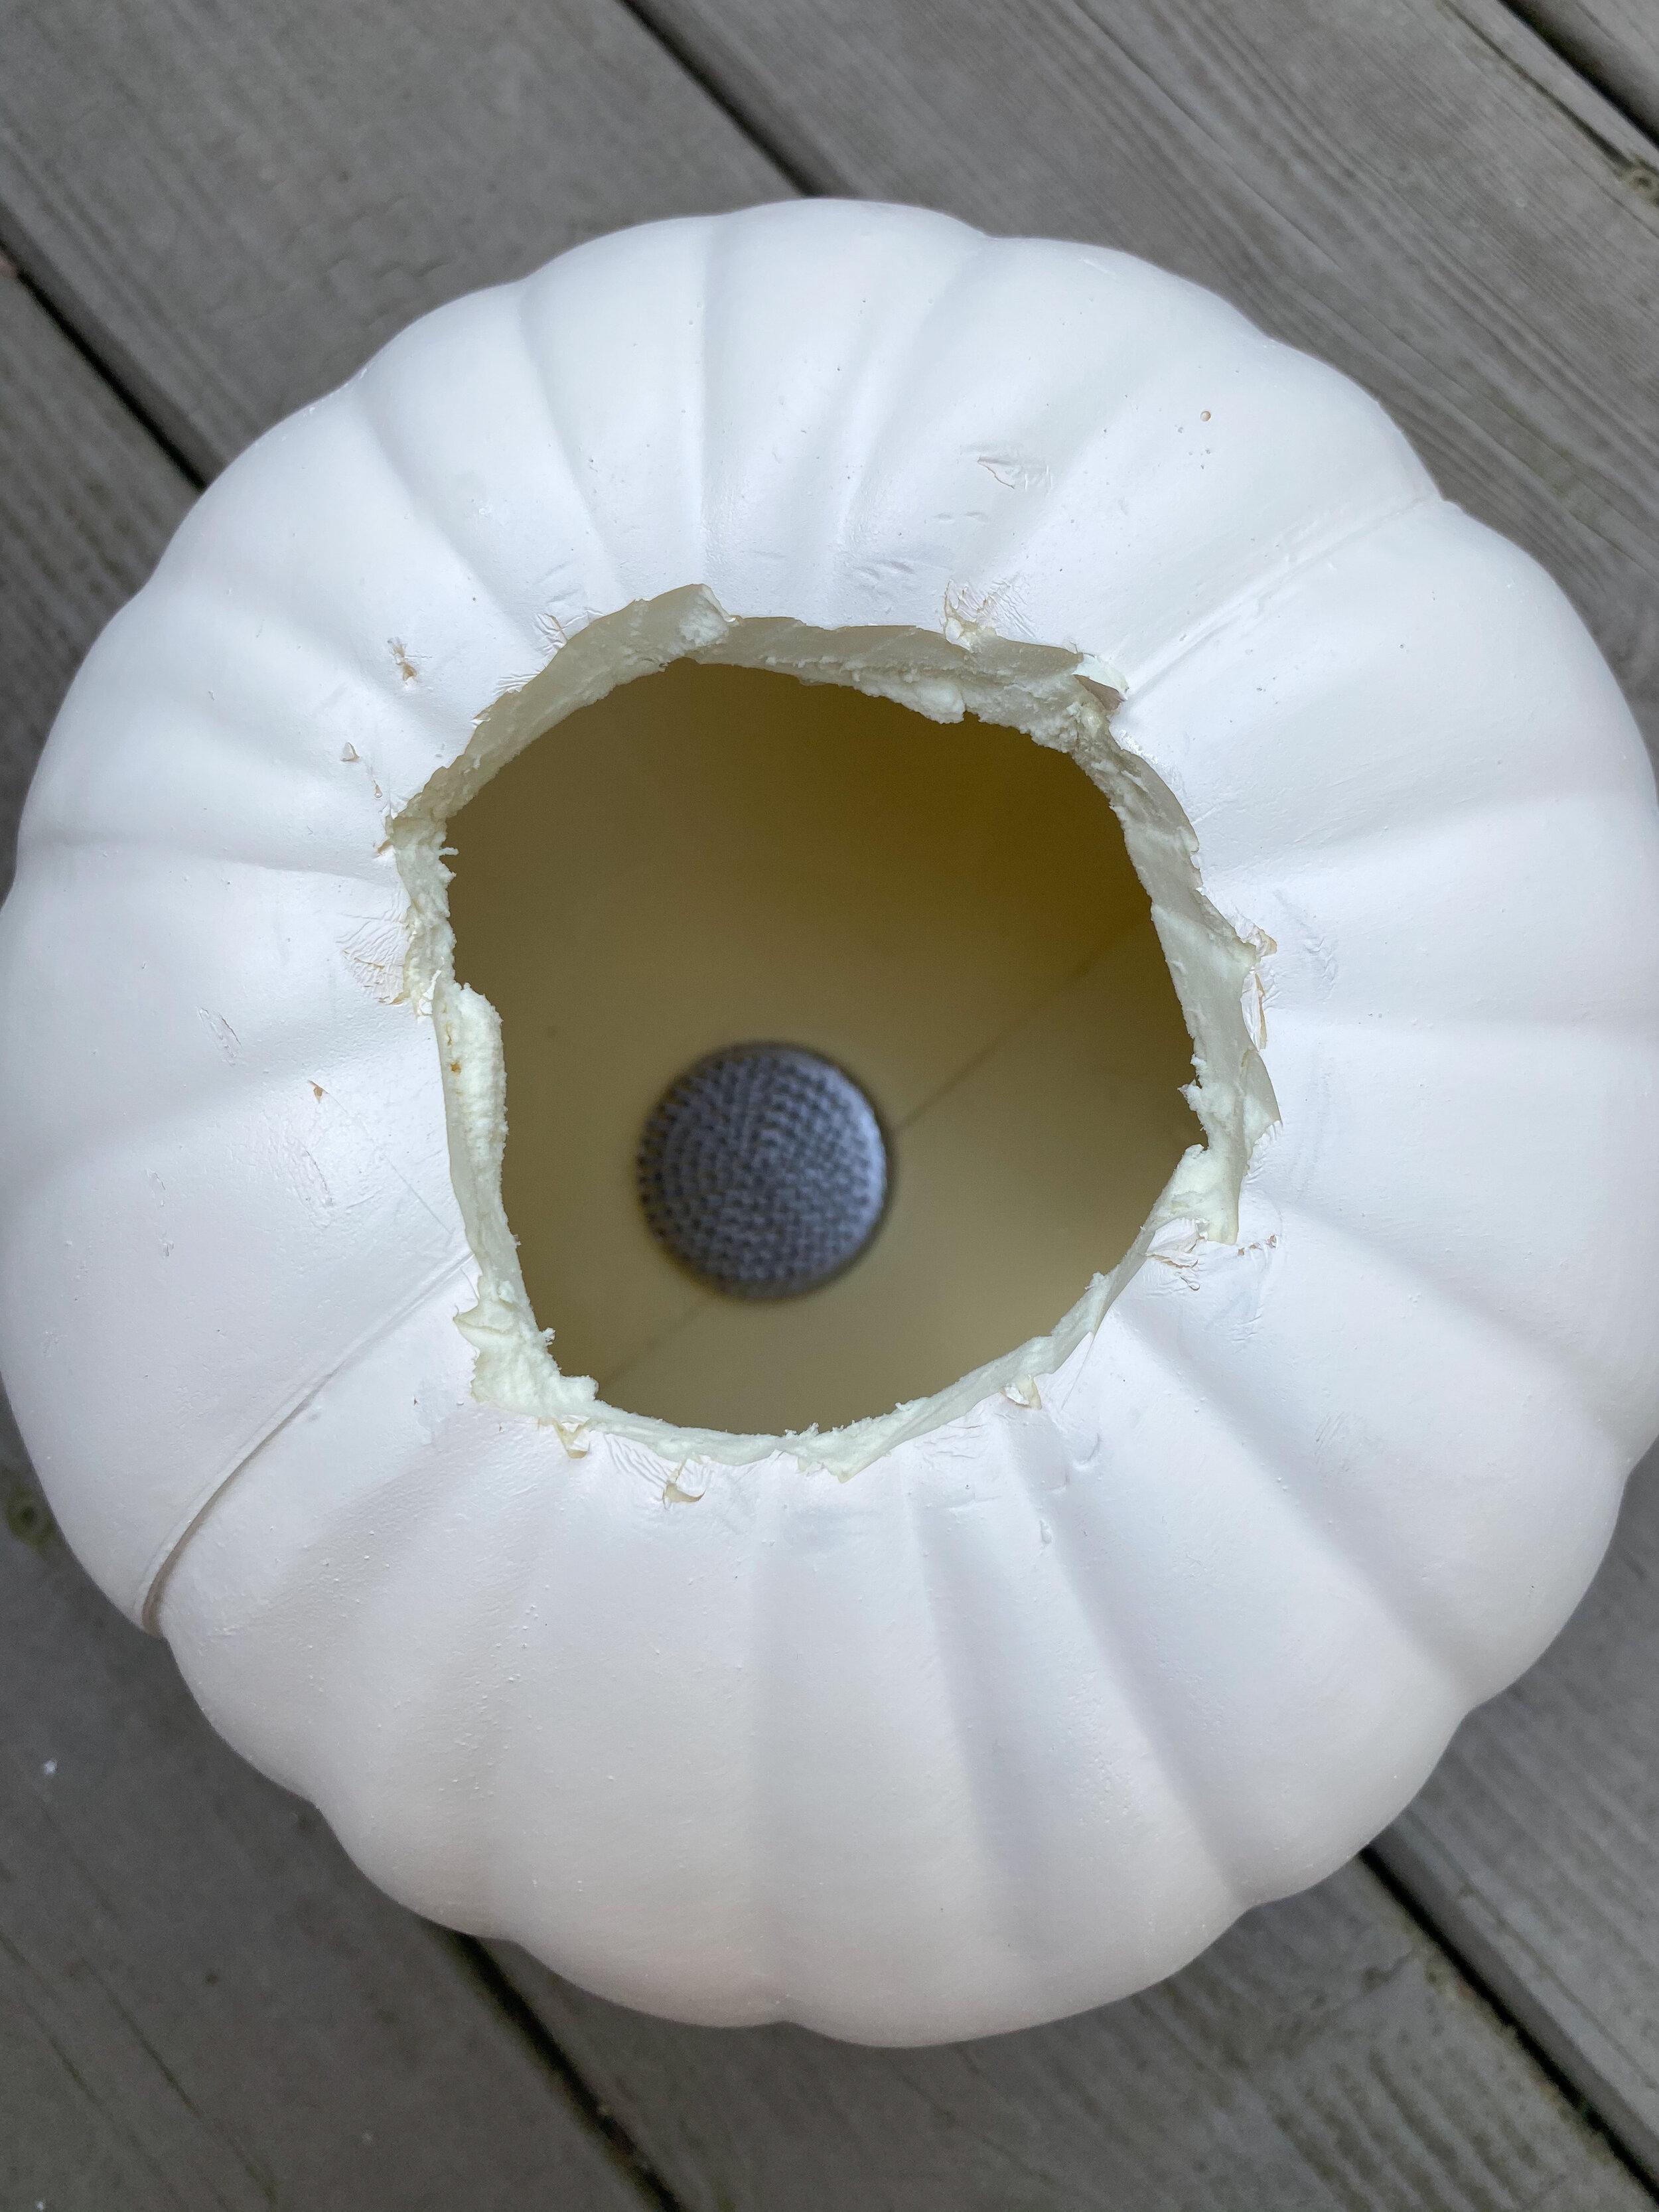

Next, place a floral frog in the center of the pumpkin. The frog may seem like it will slide around, but once you start adding florals to it, it will stay in place.
Step 3: Add your tallest pampas in the frog first
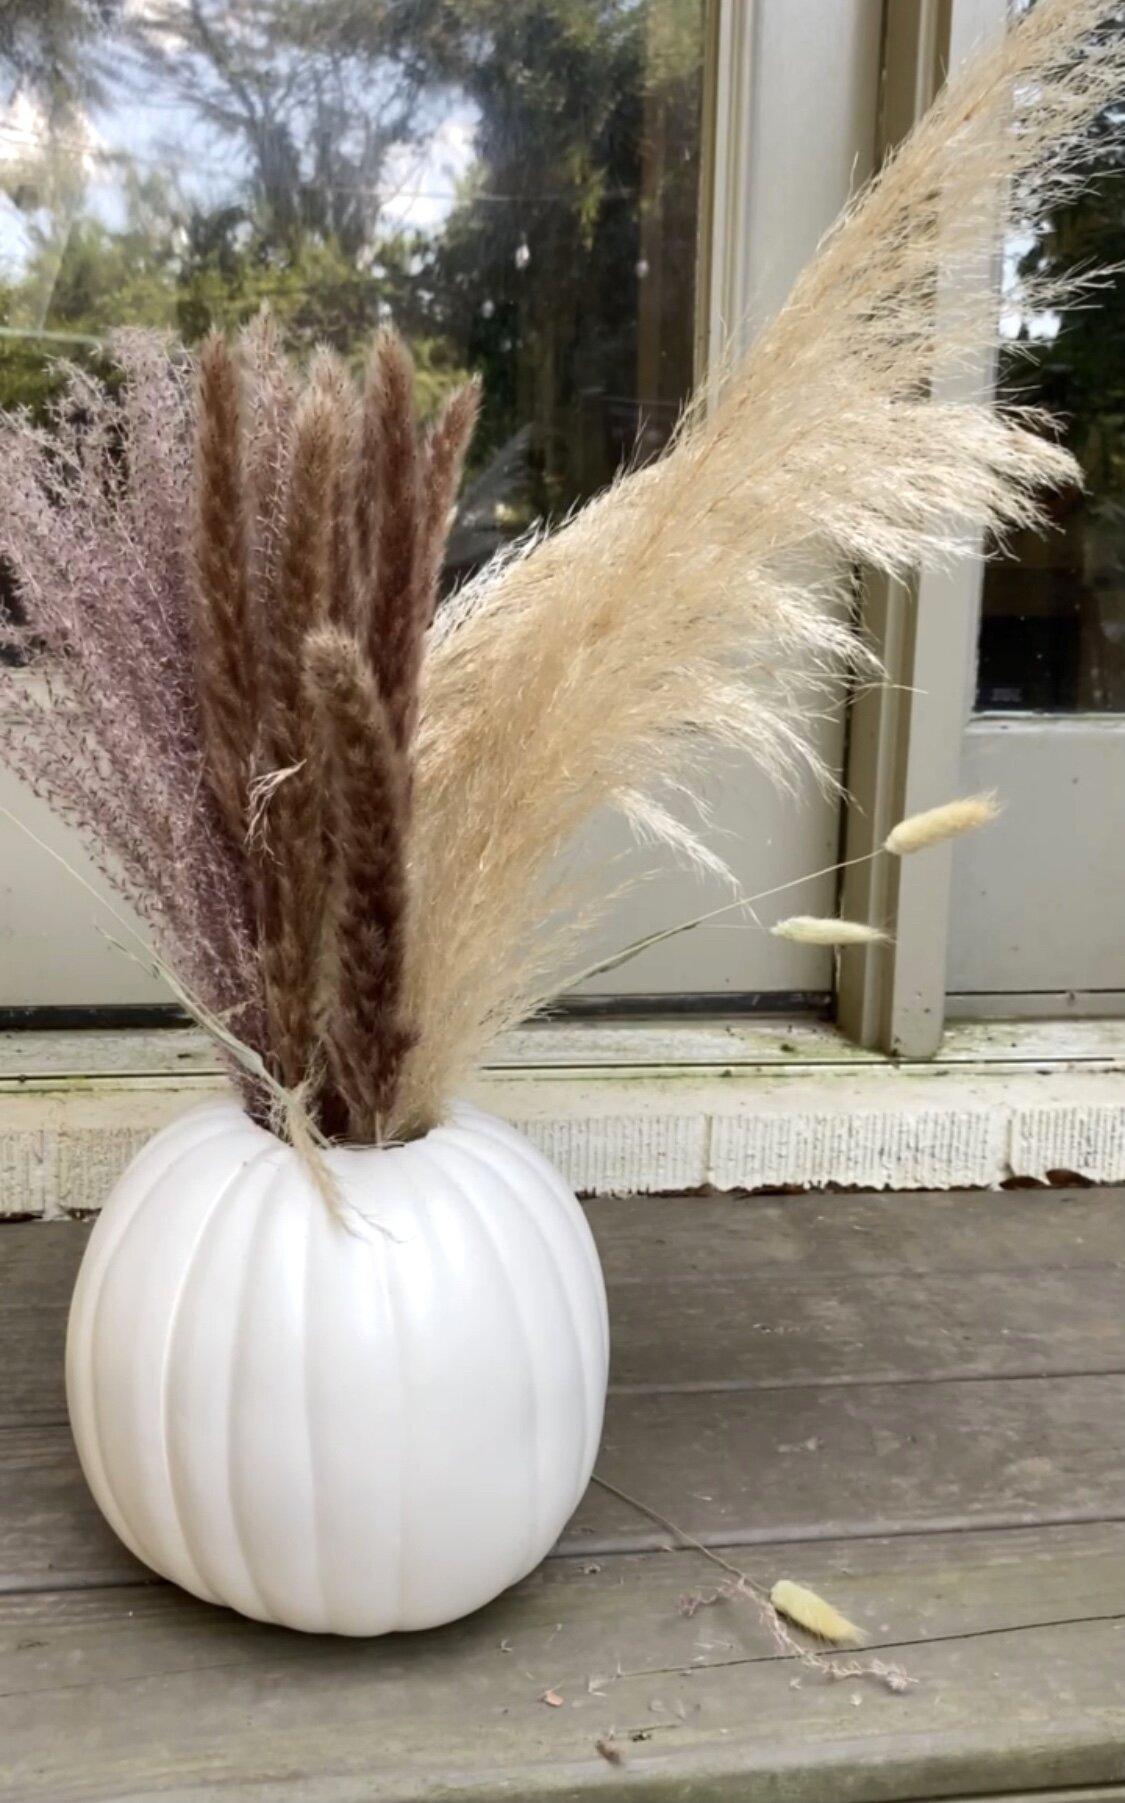

Now it's time to add the pampas! As with most flower arrangements, you will want to begin by placing the tallest pampas grass in the needles of the frog at the bottom of the pumpkin. This will hold them upright and prevent them from lumping over in your floral arrangement.
Step 4: Start adding your other florals
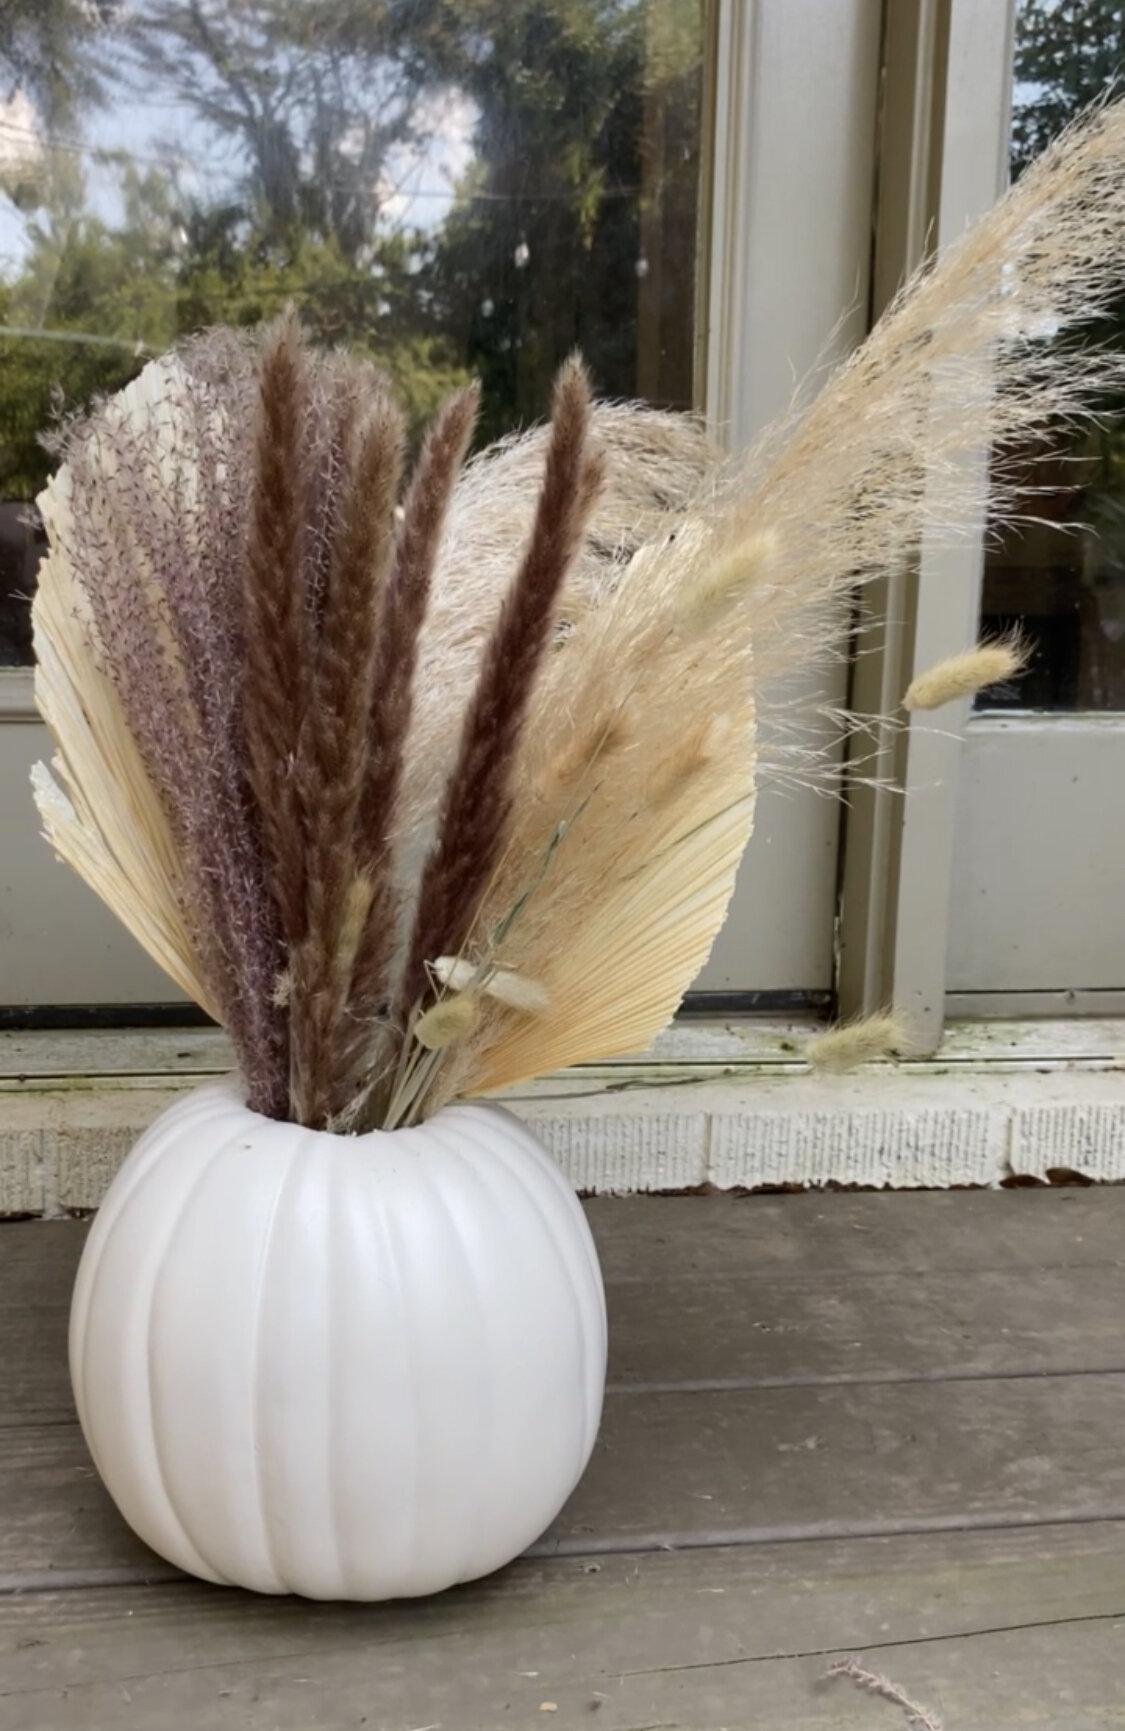

Start with the pampas, and then add in other florals. The more textures, the better! Use bunny tails, shorter dark pampas, dried palm leaves, dried flowers, or even a faux dried floral arrangement to fill the pumpkin. Add one texture at a time to spread them out and make it look more natural.
Step 5: Play with the arrangement until you love how it looks
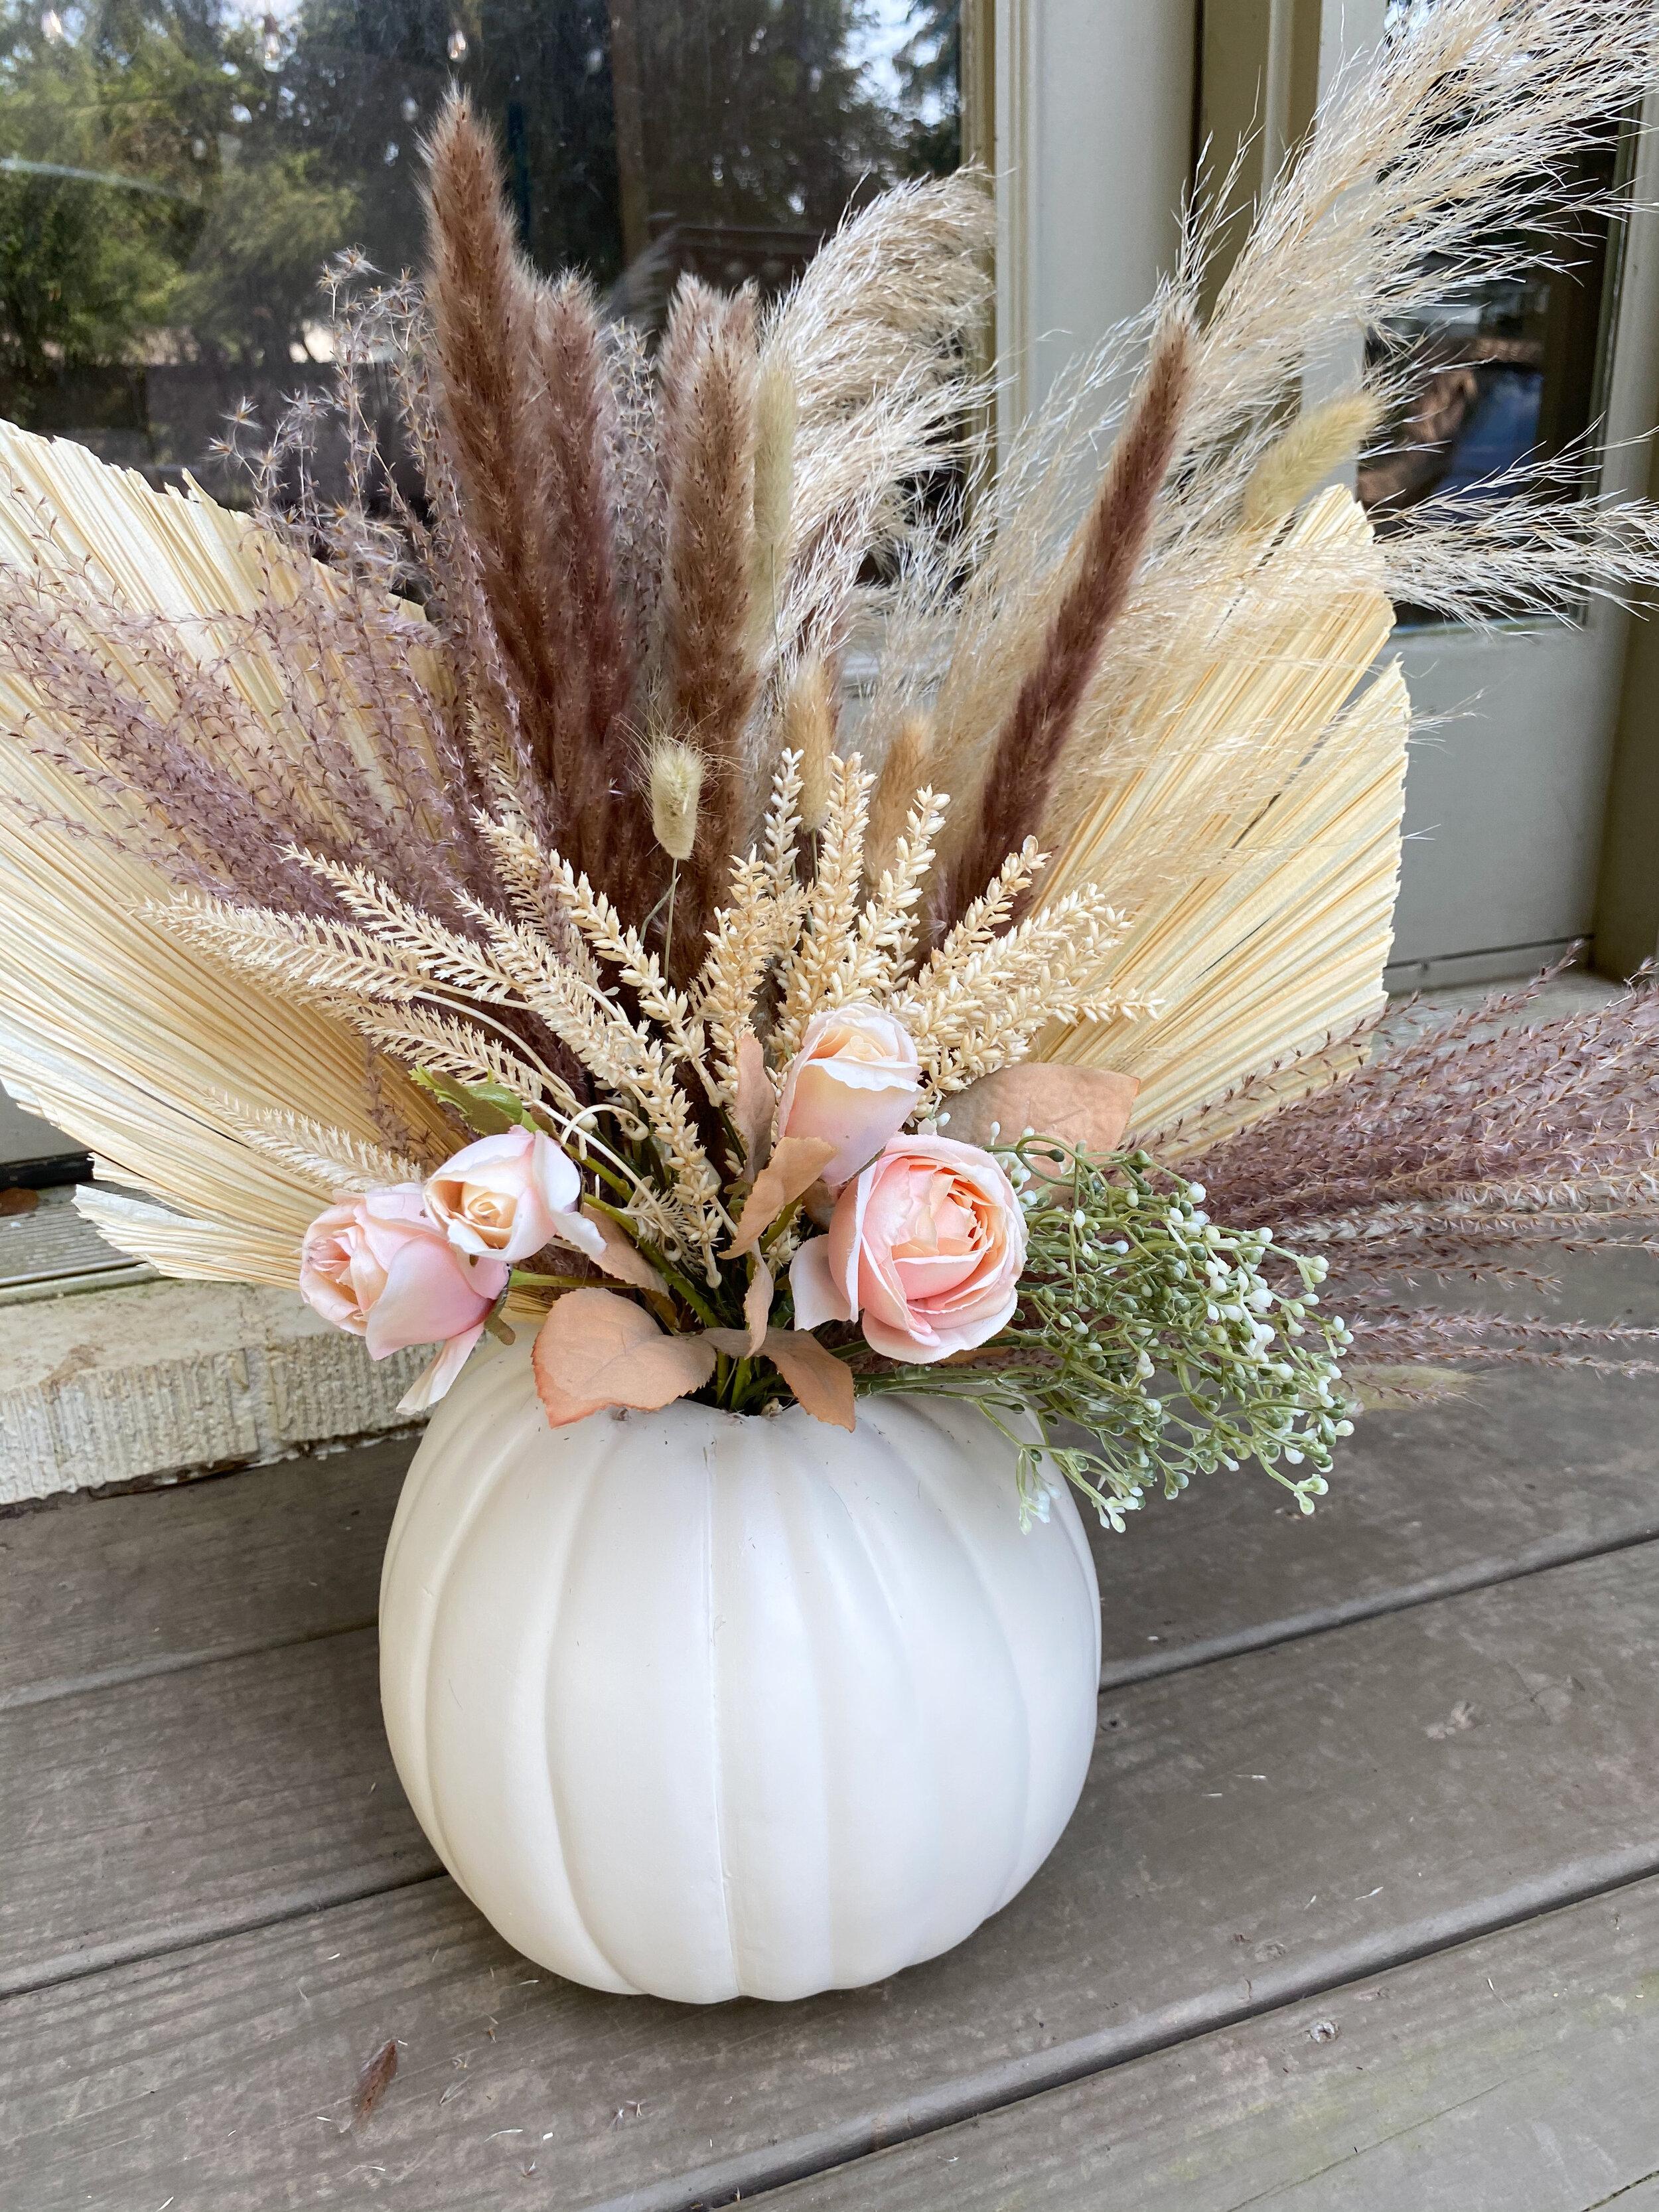

There's no right or wrong way to create your arrangement. Keep adding and taking out pieces until you get the perfect look. Depending on where you plan to display your pampas pumpkin, you can decide how wide to make your arrangement. For example, if it's going on a large console table, you may want to make it more of a fluffy, statement piece of decor.
Step 6: Wrap your garland around the pumpkin
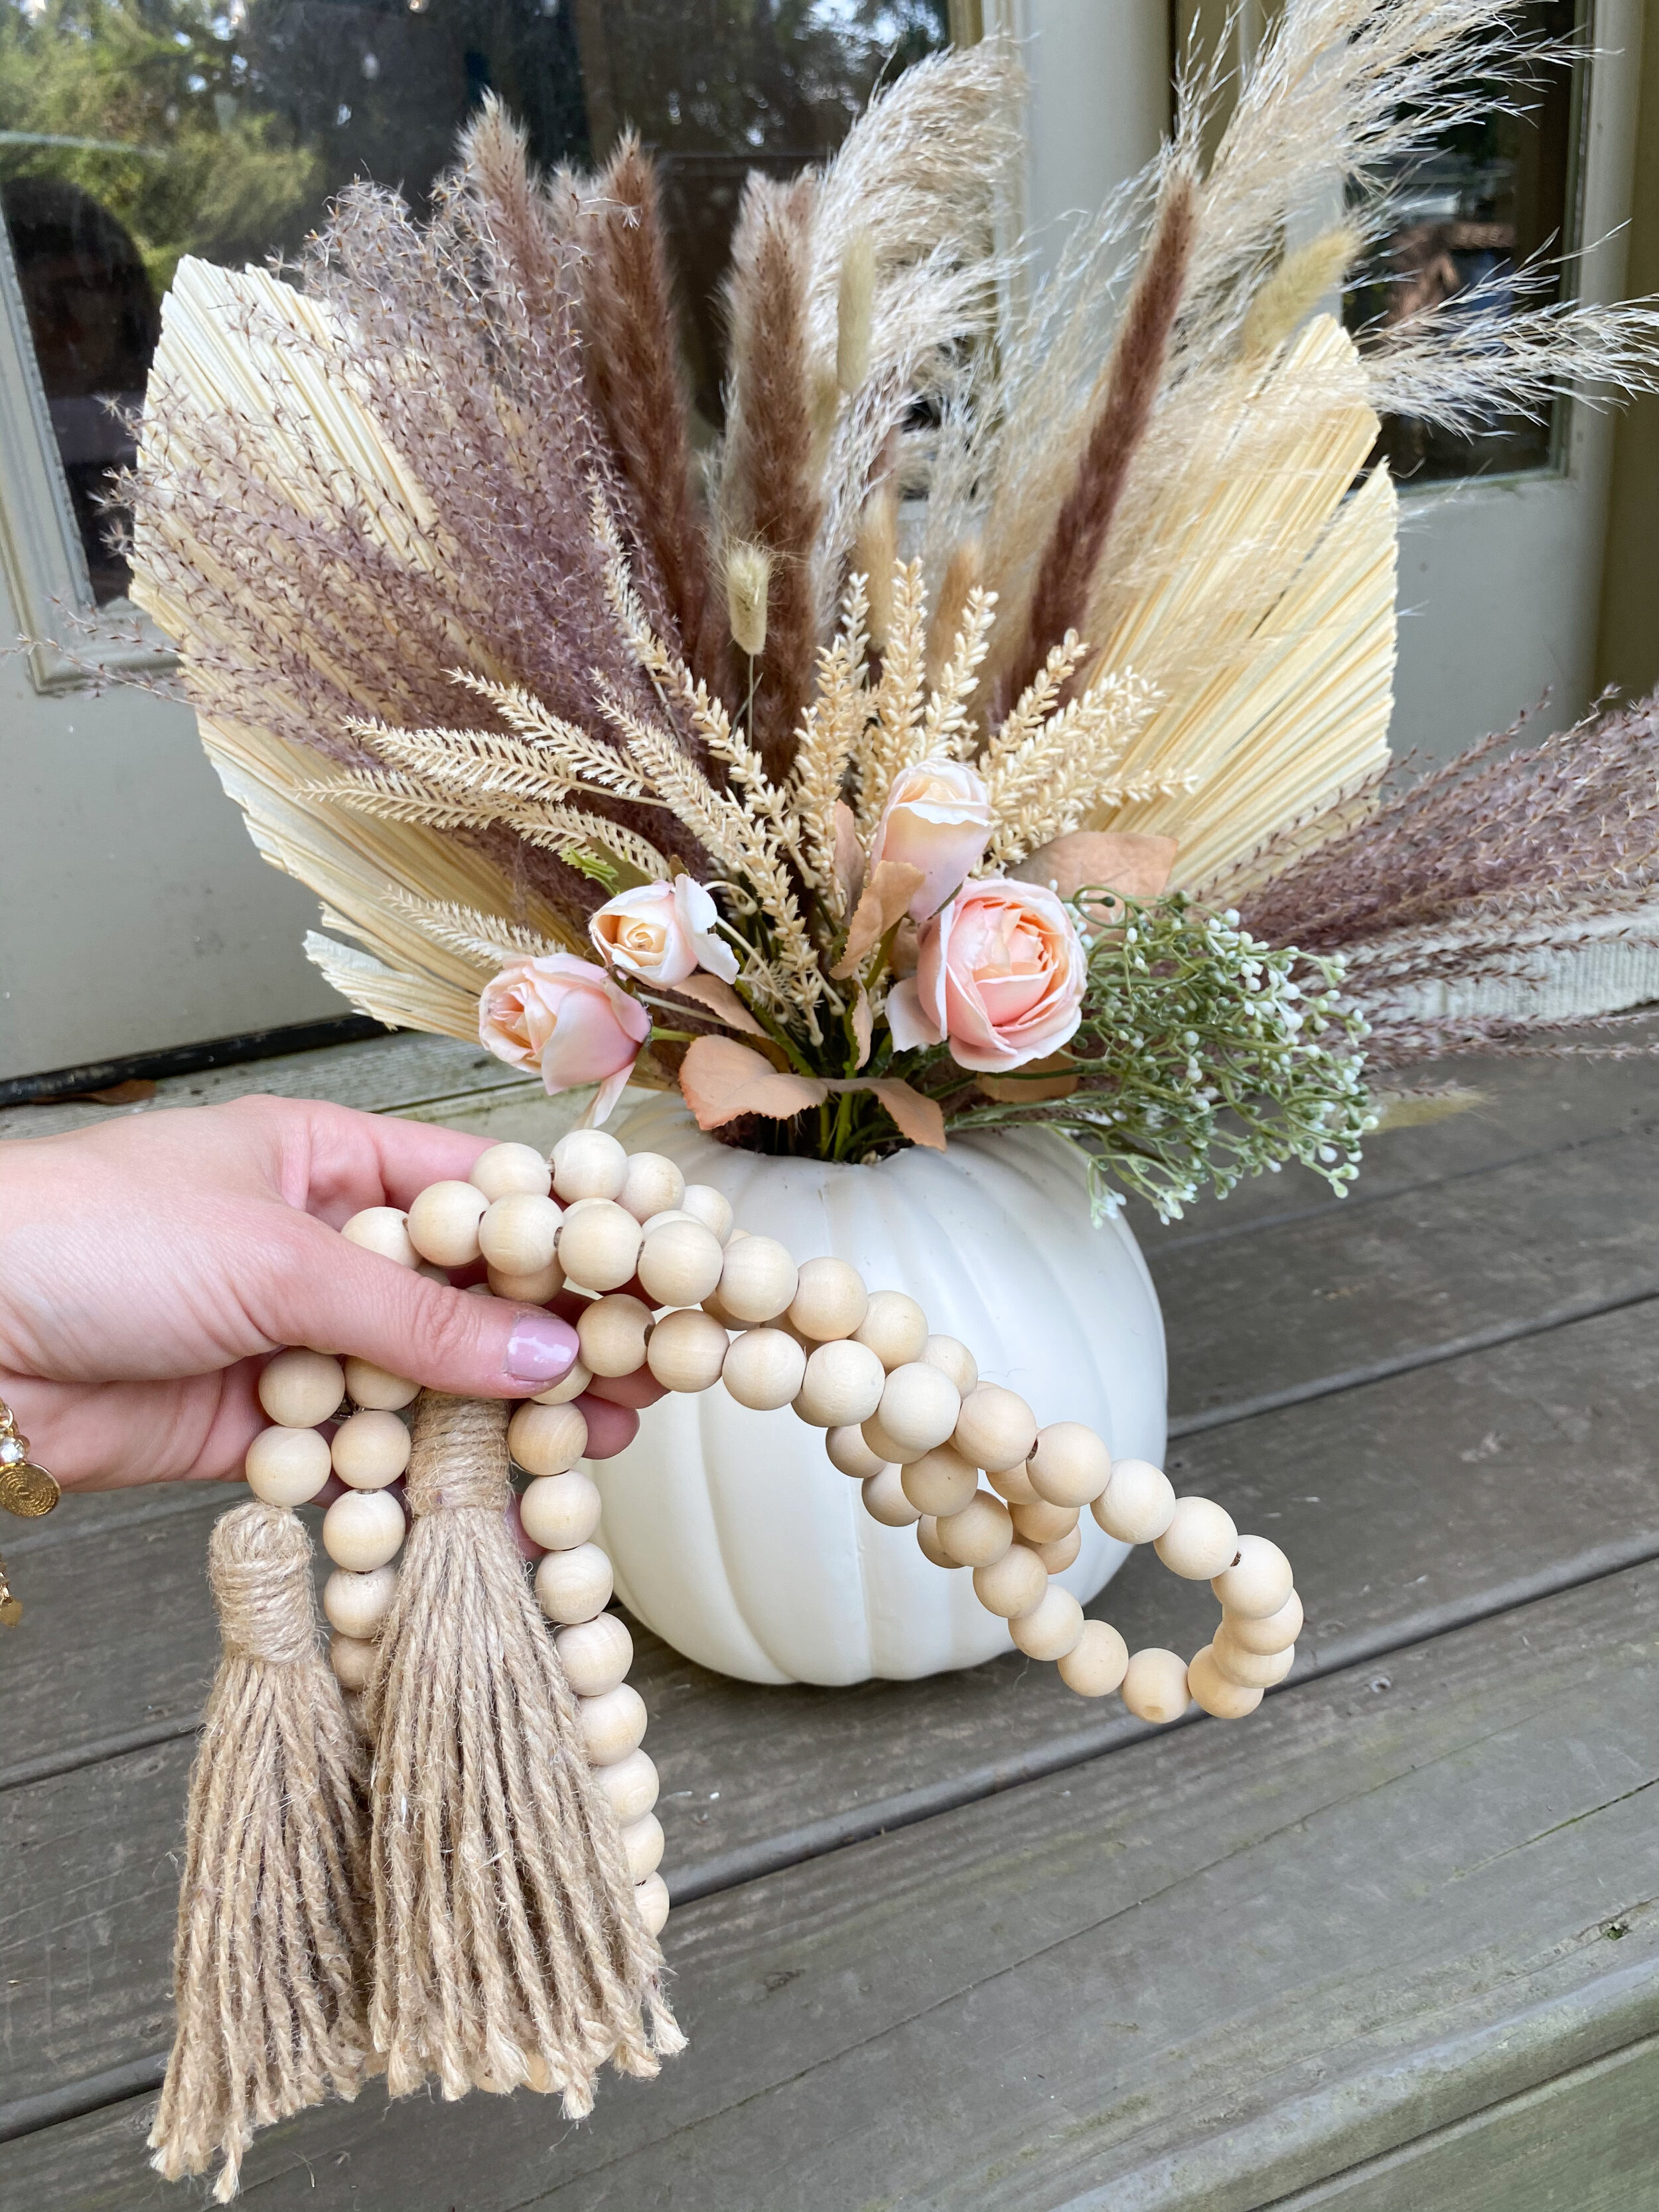

Finally, play around with the wooden garland until you love how it sits. I wrapped mine around twice and let them overlap for a more natural look.
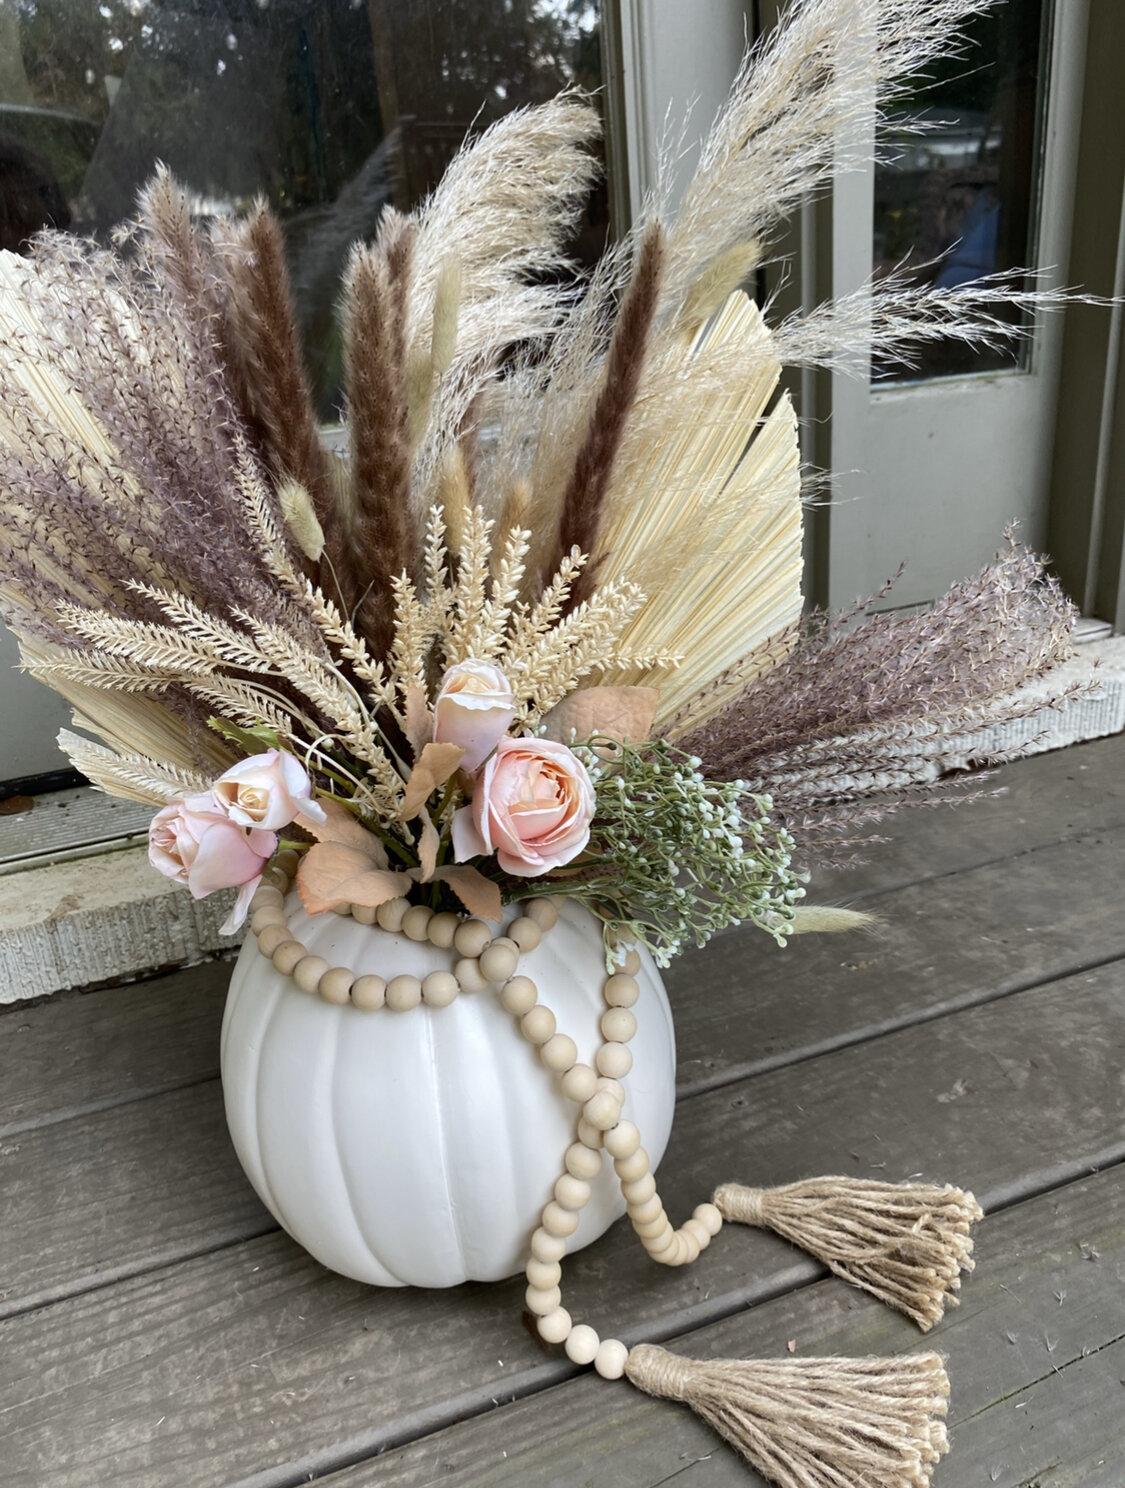

And just like that, you have a pampas pumpkin!
The beauty of pampas is its effortless and casual vibe, so don't worry about making it perfect. You really can't mess it up! If you're as pampas-obsessed as I am, stay tuned because I have a few other pampas projects planned that I can't wait to share with you.
Incorporating pampas into your decor is a great way to add a touch of elegance and sophistication to any space. It's a versatile material that can be used in a variety of ways, from centerpieces to wreaths and everything in between. And the best part? It's so easy to work with!
So, if you're looking for a unique and stylish way to decorate your home this Halloween, give the pampas pumpkin a try. You won't be disappointed. Happy decorating!
Related: Fall Staples You Need In Your Closet


